WARNING:
Keep ink cartridges out of the reach of children
~ ~ ~ ~ ~ ~ ~ ~ ~ ~ ~ ~
The following information applies to the Epson Stylus C62
and do not drink the ink.
If ink gets on your hands, wash them thoroughly with soap and water.
If ink gets into your eyes, flush them thoroughly with water.
CAUTION:
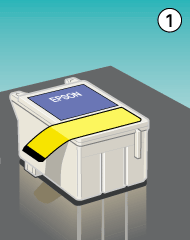
You must remove the yellow tape from the top of each cartridge or you will permanently damage it. Don't try to remove the clear seals underneath the cartridges.
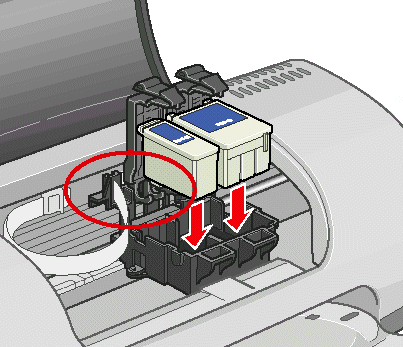
Don't touch the green circuit boards on the backs of the cartridges; you may inhibit normal operation and printing.
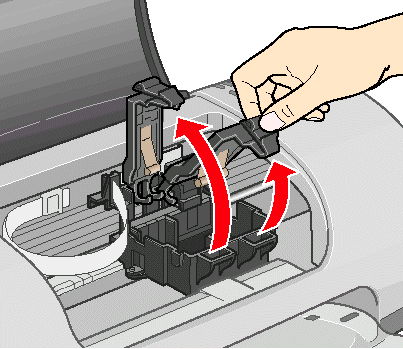
Don't place the cartridge tabs under the hooks; you may damage the clamps when you close them.
Never turn off the printer while the green power light is flashing, unless the printer hasn't moved or made noise for more than 5 minutes.
~ ~ ~ ~ ~ ~ ~ ~ ~ ~ ~ ~