
|
This website is best viewed by MSNTV and MSNTV2 internet explorer up to 6.0. If you cannot see the images on this website, I am sorry It may not be compatible for your browser. Good luck and have fun. It may be a good idea to print this page for reference. |
Hello, I have been playing with making new sigs since I have gotten my msntv2, I have come up with this new way to make banners for your sigs and pages. With much trial and error I came across this method finally. Trust me, My first trys looked awful.
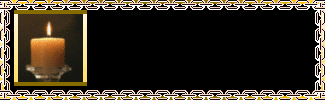
The above banner is an example of how they look.
To begin I cropped this image from a picture I have on one of my sigs.

You do not want your banner image to be very large.
You need 2 lines to make this banner. A very thin one works best for the first 2 steps.
Here is the line I used, regular and rotate right and save both.
The Line Here
Same line rotated right and saved
Now I took the above cropped image to IM and did this:
I clicked composite and entered the url of the rotated right line. Then I composited NorthWest using these coordinates.
Enter -1+0 in the box and composite NorthWest. Leave same coordinates in the box and composite same line NorthEast.
Then I took the regular line not rotated and entered it into the composite box.
North, +0-1 in the box and clicked composite. Then same for South and the image looks like this.

Now we have our image for the banner ready.
Next step. I took a plain black blank which is HERE
to IM. Entered the url into the box. I resized it to 325x100.
You may want to change the color to what you want your banner to be for annotation. I left it black for mine.
Then I clicked composite. I put the url of the small framed imaged in the box and entered these coordinates.
NorthWest, +14+8 to 11, I can*t remember exactly. and clicked composite. You may want to play with those numbers as you need to leave room around your image.
THIS we are on now IS THE MOST "IMPORTANT" STEP IN MAKING YOUR BANNER TURN OUT CORRECTLY. You can go to "decorate" also and add a 5x5 to 10x10 same colored border after adding your image. Through trial and error I found the transparent bar (step below) only drapes right with a wider border around the composited framed image.

Ok, Now let*s take this banner back to IM and repeat the steps above with the same rotated right and regular line. Same way, Same coordinates. And you will have this:

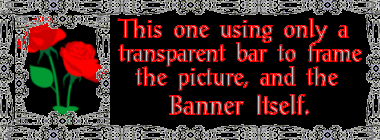
Ahhhh looking good you say. Now we need to add that last fancy touch. You will need a "transparent" thick bar. Something that matches your theme. I used this one.
Click here To fancy line
Please Note: This fancy bar can also be used on your small banner image above to make it fancier if you choose.
Which would give you this:

Then would make your banner look like this finished.

The possibilities are endless. Continue below with the tute please.
Same line Rotated Right Here
Now take your banner back to IM, and Do same as above 2 steps again with the transparent bar. But play with the numbers. Never change the +0. But try -1, -2, -3, -4 Etc; for the others till it looks like you want it to. It looks good when you let your transparent bar overlap into your banner to a certain extent. Wella, Here is what you have.
Of course depending on the size of the banner image and such, You will have to work with the numbers till you get it the way you want it. As I said, I came across this while learning a new way to make sigs for the msntv2 newsgroups and email.
Here are a few thin lines you may use if you would like. I got them all Including the transparent ones from a royalty free image site.
Silver
Blue
Green
Pink
Purple
Red
Light Blue
Here are some transparent thicker bars for you if you would like to try this tute. Or you can use your own of course. :)
Pink & Blue
Silver Gray
Silver Gray
Silver
Dark Gray (nice)
Blue
Red
Examples using this method
To This using -30 for the transparent bar.

Another

IM Links Page
Go to Image Magick Here
Have fun and Happy banner making. Remember the thinner the lines, The better your banner will look. Except for the fancy one. That one can be quite "thick" and look great. As a matter of fact, The thicker for the transparent see through bar, The better.
Here is one you can try if you would like to practice.
Here is the sample picture I used

Here is the bar regular and rotated right for you.
Regular
Rotated Right
I used -7+0 for NorthWest and NorthEast rotated right bar. And +0-7 North and South for the Regular one. on both the picture and the banner. I hope you enjoy this tute.
Or

Here is the white bead line for you regular and rotated right
Regular here
Rotated right here
Just follow instructions above. Frame image and banner with beaded line using this:
NorthWest and NorthEast -2+0
North and South +0-2
Then add transparent bar above playing with the numbers.
I used -4+0 NorthWest and NorthEast with the transparent "Rotated Right" bar on the image after I framed it with the beads.
Then after I framed the banner with the beads, I composited the "Regular" transparent bar North and South +0-10.
When I took the black background to Image Magick for this one, I resized it to 350x110! (same height as the banner image) Then I composited the banner image NorthWest +0+0. And added a 15x15 black border using decorate before framing it. I hope I am not making this to complicated to understand.
Here is the how and why I came across this method of banner making. Click below to a page/sig I made and how I discovered this new way of making banners. As I said above, I made many "bad" looking ones before I came up with this way. I wanted to share with you what I discovered while playing and trying a lot. Please do see the page below. Then you will understand why I wanted to share this method.
Click here to see it all on a page.
You may email me from Lace's Place below if you have any questions.
Back to Lace's Place
© October 20, 2007.
All Rights Reserved Do not duplicate this tute.
|
Disclaimer As far as I know, All images on this site are royalty free images. If you see any that are yours you may email me and I will remove it immediately. As far as I know, This tute has not been made by anyone else, If you see another tutorial that shows how to make banners exactly like these, Email me with the url please. You may click on Lace's Place above and email me if you need to. Thank you very much. Janea Lee |